آموزش فتوشاپ و ترفند های آن
آموزش تاکتیک ها و معرفی ابزار ها، دانلودآموزش فتوشاپ و ترفند های آن
آموزش تاکتیک ها و معرفی ابزار ها، دانلودطراحی "قطره متون در آب" اثر تایپوگرافی در فتوشاپ
OK Let’s get started!
To complete this tutorial, you will need the following stocks:
Step 1
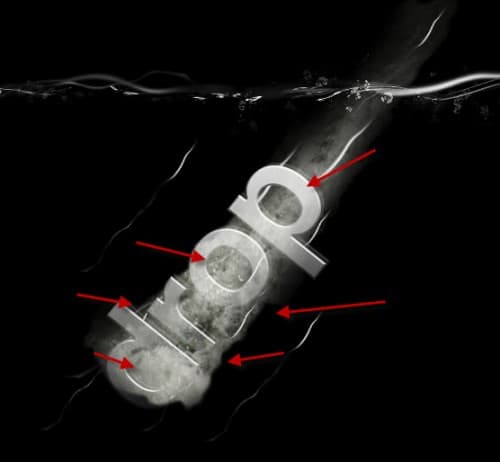
Create a new document with black background, use the font we downloaded to type some letter on the canvas, rotate the text as shown below to form an angle:
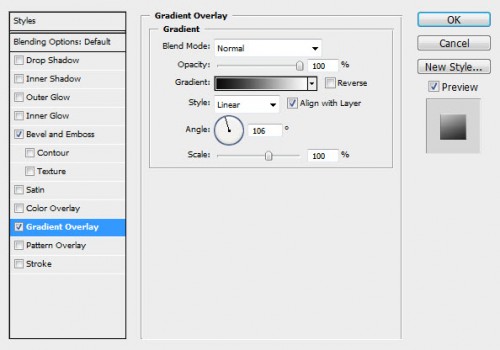
Apply the following layer blending options on this text layer:
Bevel and Emboss
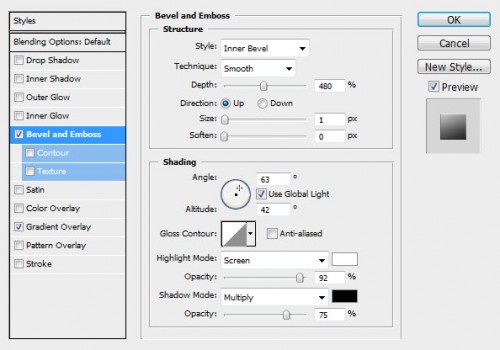
Gradient Overlay
and here is the effect so far:

Step 2
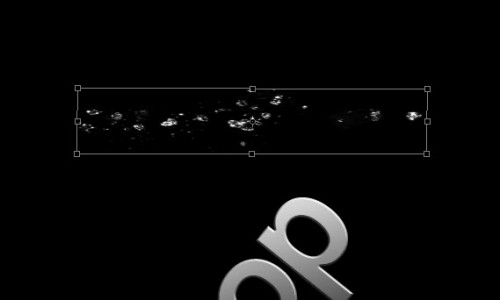
We will now create a simple water surface. Use a water brush and paint some drops on the canvas, then rotate it with the free transform as shown below:
Then use the liquify filter (forward warping tool) on these water drops and produce the following effect:
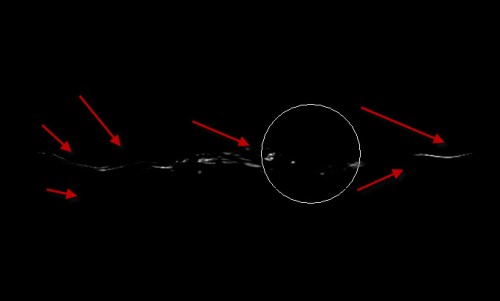
Use a soft eraser to erase some parts and the edges of the water to add depth:
and here is the overall effect:
Step 3
Now we will create some abstract lines around the text and on the water surface to give it a flowing effect. Pick a round brush as shown below:
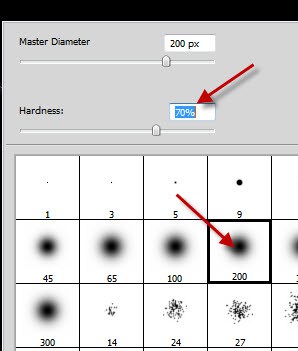
Create a new layer and paint a dot on it, then use the liquify filter to manipulate this dot into a line shape:
Duplicate this abstract line layer a few times, and put those layers all below the text layer:
Duplicate more abstract lines and move them above the text layer:

Step 4
If you have any difficulty with this step and step 5, check out this video tutorial I have on psdvault.com. Youtube Channel:
Let’s add some water texture over the text. Load the water image into photoshop and select a portion of the water using the quick selection tool:
Copy and paste the selection over onto the text, adjust the shape with the free transform tool, and erase the following area with a soft eraser to reveal the text underneath:
Add the following 2 adjustment layers as clipping mask to this water texture layer:
Levels
Black and White
Then change the blending mode of this water stream layer to “Pin Light”:

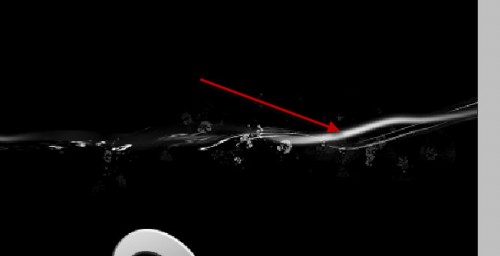
Further erase the water texture with a small soft eraser from the areas indicated below:

Step 5
OK we’re almost done! For some final touches, I added some more water stream textures around the text, by duplicating the water stream layer done in the previous step:
Hint: Resize those duplicated layers with free transform tool to add variety.
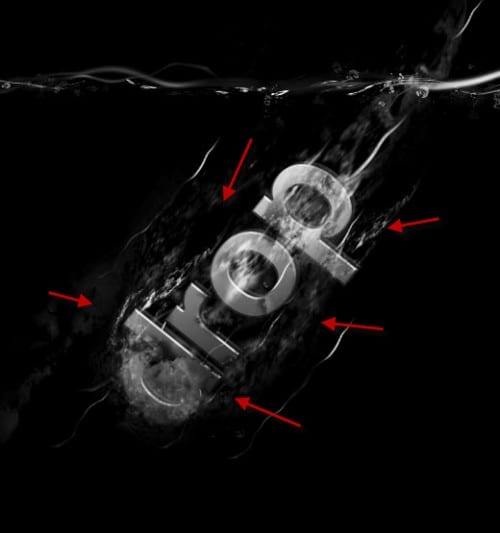
We can also add some splashing water on top of the water using the water brush: (use free transform tool to adjust its shape and angle)
Use the cloud filter or a cloud brush to add some cloud/smoke around the text for extra effect:
I then further added some colour effect onto the image with selective colours and image adjustment layer, and here is the final effect I have: (click to enlarge)

That’s it for this tutorial! Hope you enjoy it and find it useful! Till next time, have a great day!


