آموزش فتوشاپ و ترفند های آن
آموزش تاکتیک ها و معرفی ابزار ها، دانلودآموزش فتوشاپ و ترفند های آن
آموزش تاکتیک ها و معرفی ابزار ها، دانلودطراحی برفی قطب شمال اثر متن در فتوشاپ
OK Let’s get started!
To complete this tutorial, you will need the following stocks:
Step 1
Make sure you install the font into your system first, then Click here to download this PSD file and load it into Photoshop – the text is rendered in illustrator so to save you guys some trouble, I have the PSD File ready for you:
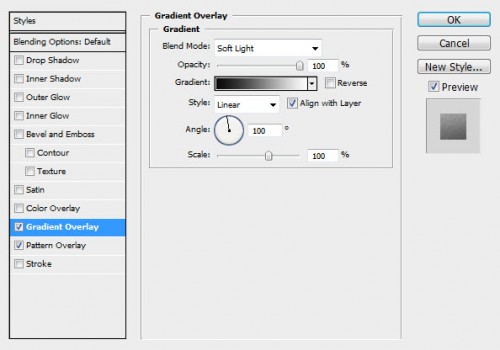
Apply the following layer blending options to this text layer:
Gradient Overlay
Pattern Overlay
and here is the effect you will have so far:
Step 2
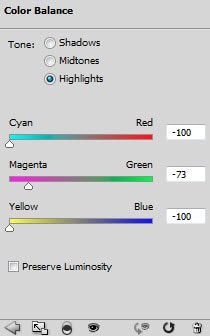
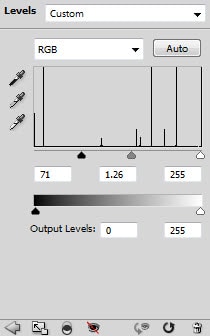
I decided to alter the colour of the text layer a bit, so I added the following adjustment layer over the text layer, as clipping masks:
Color Balance
Levels
and here is the effect so far:

Step 3
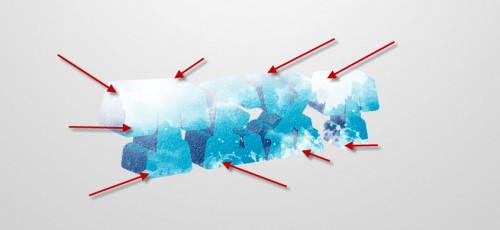
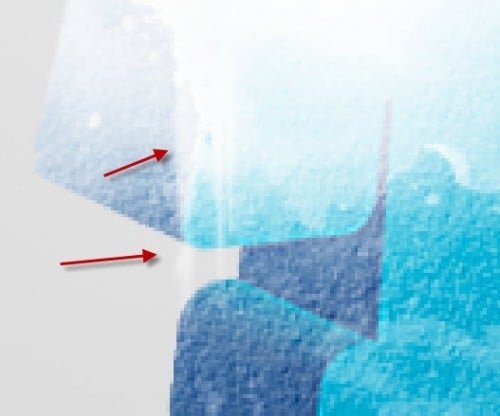
Now let’s add some snowy effect on the text. Create a new layer over the text layer and set it as clipping mask, use the grungy brush you downloaded, paint some white texture over the text:
Hint: you might have reduce the brush size a bit before you paint.
Use the ice brushset to add some dripping ice effect over the text as well:
Let’s add a snow field under the text. Load the snow field stock into Photoshop, then use a 30px feather lasso tool to draw a rough selection as shown below:
Copy and paste the selection onto our document, put the layer below the text layer, distort and resize it to fit the shape and direction of the text:
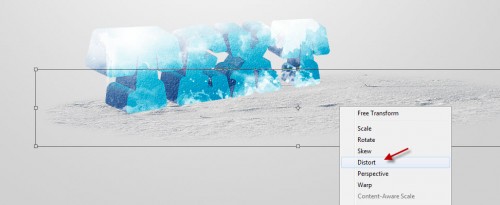
Use a soft eraser to remove the edge of the texture as shown below:
Duplicate this snow field layer a few times, and attach the duplicated layer to left and lower right of the original layer, to add some variety:
Step 4
Now we can add some windy effect onto the snow field for some dramatic effect. Let’s go back to the snow texture layer (the one we set as clipping mask) which we did in the previous step, duplicate this layer once and keep this layer above all previous layer, apply the following warp setting to it:
Hint: you can firstly scale this snow texture layer down, then apply the warp option.

and you will have the following effect:
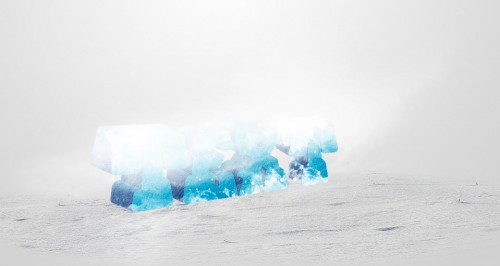
Duplicate this wind layer a few times, scatter the duplicated layers around the snow field, as shown below:
Also go back to the original text layer, use a small soft eraser, gently remove the bottom edge of the text, and make them submerged into the snow:

Step 5
We’re almost done :) For some final touches, I decided to add a polar bear into the image just to add some depth. So load the bear image into Photoshop, select the polar bear part:
Copy and paste the bear into our image, put the layer under the snow wind layer, this will make the bear semi-visible: (You can also reduce layer opacity of this bear layer to achieve the same effect)
I then further added some snow texture and cloud around the text, and here is the final effect I have: (click to enlarge)
That’s it for this tutorial! Hope you enjoy it and find it useful! Till next time, have a great day!


